Pages

Showing posts with label Projects. Show all posts

Oct 5, 2017

A New Look For An Ugly Fan


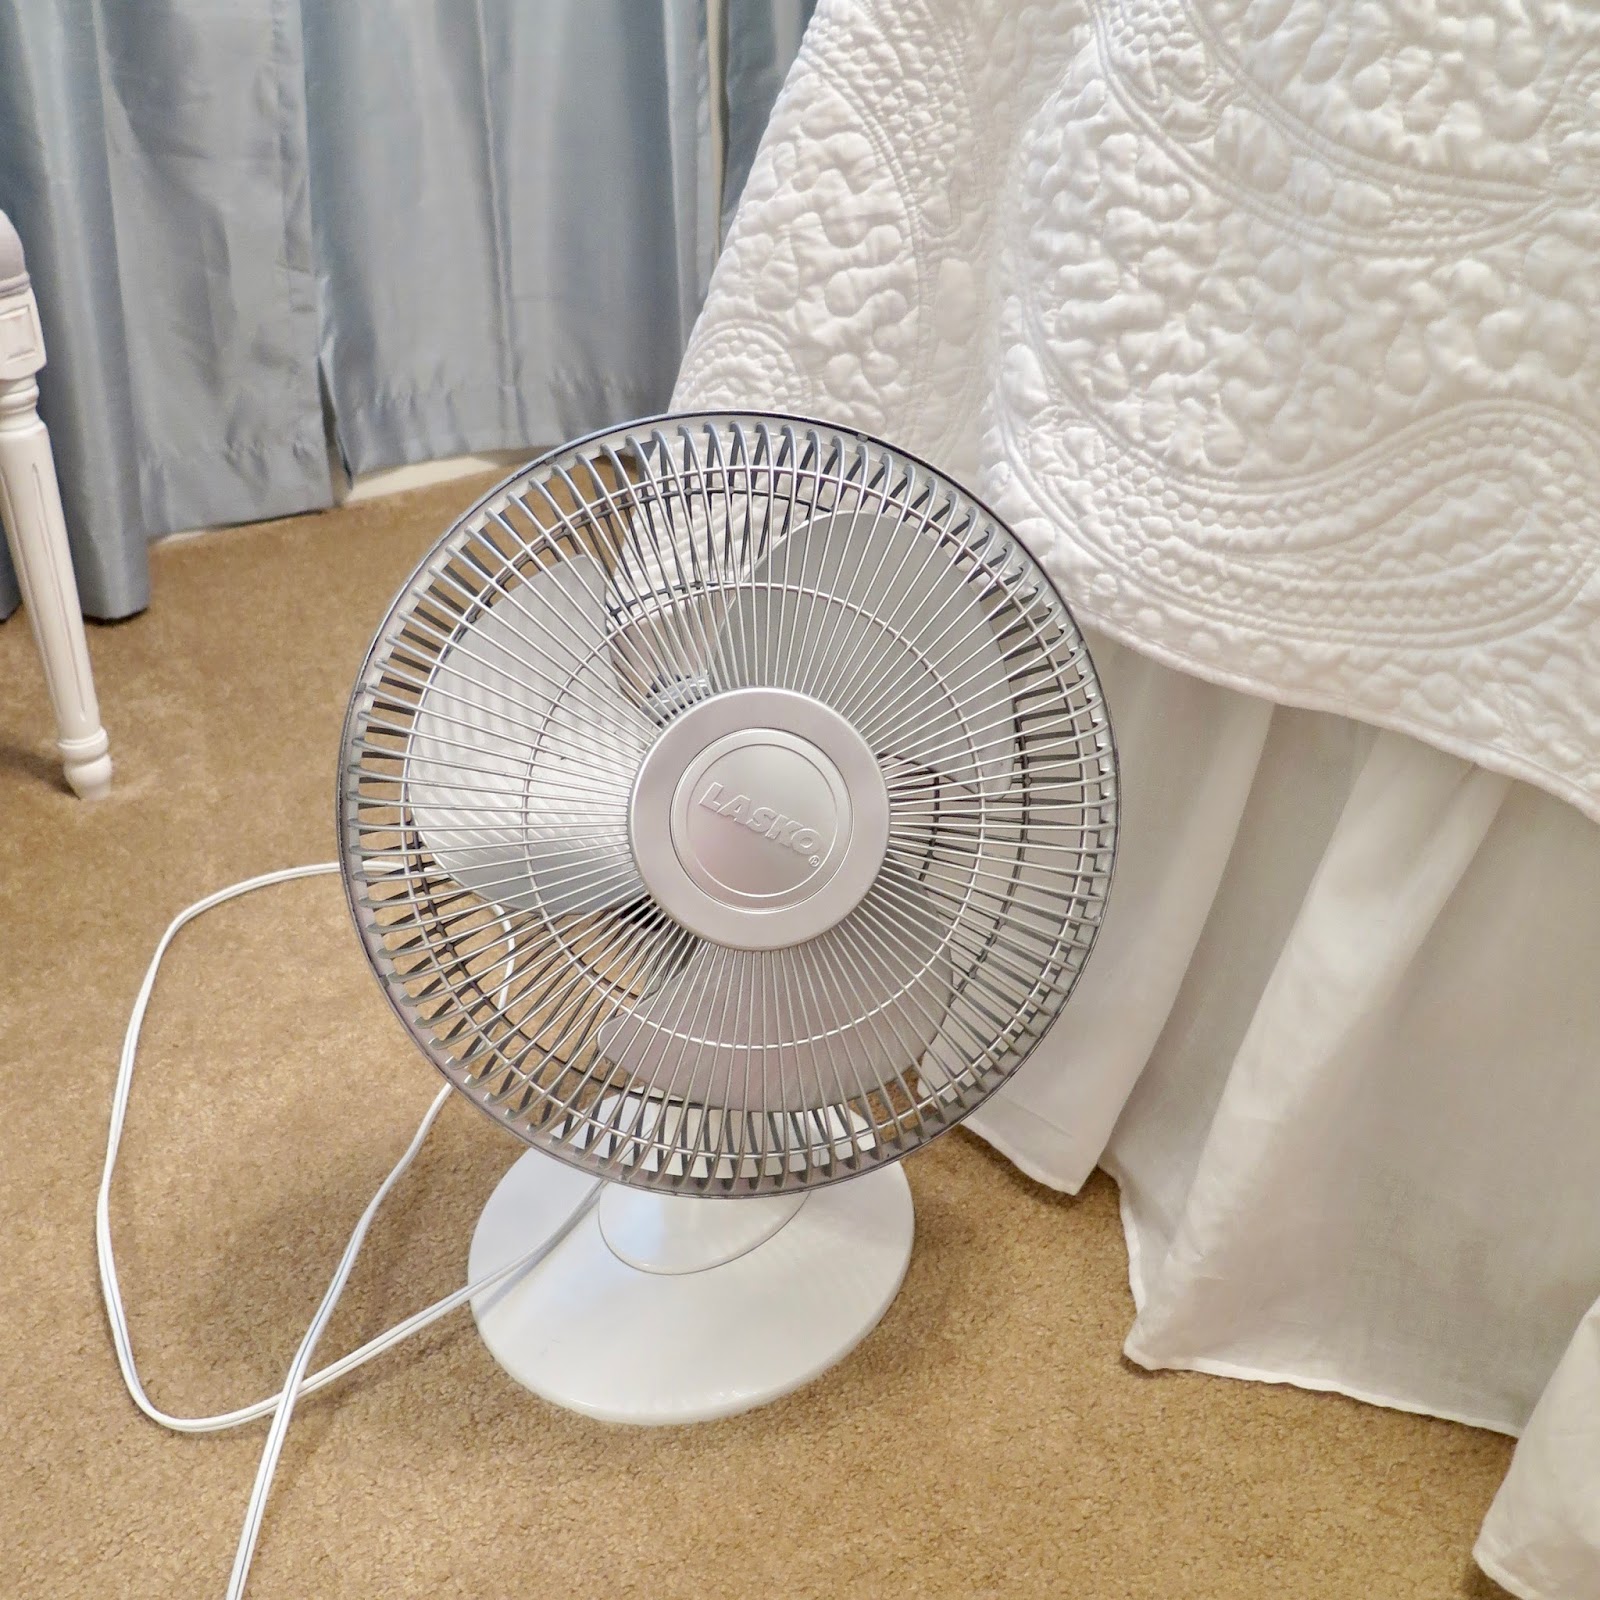
Today I am sharing with you a project I did before Hurricane Harvey.  I had an ugly black fan I really wanted to make pretty.  Truth be known, I have admired the really nice fans for years but I refuse to shell out the money for one.  Like this beauty at Bed Bath and Beyond for $99.  :)


So I took apart my fan and spray painted it.  I used the Rust-oleum Metallic paint for the grill and the blades.

#rustoleumrocks


I don't have any pics of the base being painted.  I used Rust-oleum White paint for the base.

I am very happy with the way it turned out.  It blends in with the room now instead of sticking out like a sore thumb.  It has a much softer look.


Do you have anything around the house you feel needs an update?  All you need are a couple of cans of paint and a little time.  Oh and some decent weather!

Hope you have a wonderful day!

Take care,

xoxoxo

Debbie


Aug 24, 2017

Sprucing Up the Front Porch


Do you ever have one of those projects you see and think to yourself "I need to paint those" and forget about it as soon as you leave the area?  The front pots were definitely on my "need to do" list that I kept forgetting.

Wow!  I can't believe how bad they really looked.  :0(  Especially when I cleaned them up a bit.  They were in need of some TLC.


Since it was so hot outside, I brought them inside and hand painted them with a glossy black paint.  I applied four coats of paint.


Once they were dry, I decided they needed a little pizazz to dress them up.  I used my very old Fleur de Lis stencil and some gold paint and gave them a new look.


I am very happy with how they turned out.


The best part was it didn't cost me anything but a little time.  I had all of the supplies on hand from previous projects.  Except for the moss.  The moss is new...the old was so disgusting.  Yuck!!!  I got it for $1.75 at Hobby Lobby.


Have you looked at your front porch lately?  I mean really looked at it?  :)  Your front porch is the first thing guests see when entering your home.  So get out there and clean off those cob webs and refresh your look.  You'll be glad you did!

Take care,

xoxoxo

Debbie


Aug 3, 2017

Before and After Projects


Yes, I am at it again!  I can't help myself.  I want to paint EVERYTHING and make it new again.  Believe me, I have it real bad!

Here are a few before shots of the trash can we keep near the pool.  As you can see, it had seen better days.  It was in great shape but the only thing wrong with it was it needed to be revived.


I used the same paint I used to refresh our wicker chairs on our front porch.


#rustoleumrocks
#espressobrownismyfavorite

Look how great it looks now.  OMG!!!  I can't get over the difference two cans of spray paint can make.


Of course, I didn't stop there.  On the other side of the house, where we keep our pool tools, was a chest in great need of a makeover.  More like in desperate need of some color, right?


Here is what it looks like now.  GORGEOUS!  And it only took MAYBE 15 minutes total.  That's right.  15 minutes my friend!


Isn't it a beauty?  It looks brand new and only took two cans of paint.  Way cheaper than the cost of a new chest at $100.


So look around your home and see if there is something that could use a little reviving rather than replacing.  I think you will be tickled pink with your makeover.  I know I am!

Hope you have a fabulous Thursday!

Take care,

xoxoxo

Debbie


Aug 2, 2017

My Latest Project


Hello and happy Wednesday!

Over the weekend I finally got started on my cedar post candle holders.  These remnants were left over from the pergola we had installed back in May.  When I saw these laid over in a pile, I knew immediately what I wanted to do with them.


We bought a 4 1/8 inch Hole Dozer Hole Cutter to use with our drill.  This was not a fast project.  It was a very SLOW project.  Something like 3 1/2 hours.  :)


After I drilled down the depth I wanted, I began to chisel out the wood.  OMG!  It's a good thing I had the vision of what I wanted and the determination to push through.  It helped that the wood wasn't really hard.


I only managed to hollow out two of them.  I still have two more to go!  I am sure there is a better way to do this...hopefully one of you will enlighten me!  I'm always open for new ideas!


As you can see, they are still in rough form.  I will need to sand the tops and the inserts to smooth them out.  I can't wait to actually use them.  Could be next summer?!

Have you ever done anything crazy like this?  If so, I'd love to hear about it!

Take care,

xoxoxo

Debbie